

What is Google Search Console
Getting your website on Google Search Console is a vital step in ensuring it gets properly indexed and appears in search results. This powerful tool provides valuable insights into how Google views your site and allows you to address possible issues. Let’s walk through the step-by-step process of adding your website to Google Search Console.
Step 1: Sign in or Create a Google Search Console
If you don’t have a Google account, begin by creating one. If you have already an account, sign in to Google. Visit Google Search Console and click on the “Start now” button.
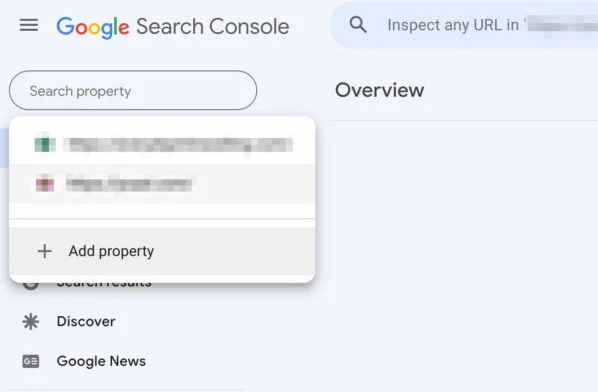
Step 2: Add a Property (Your Website)
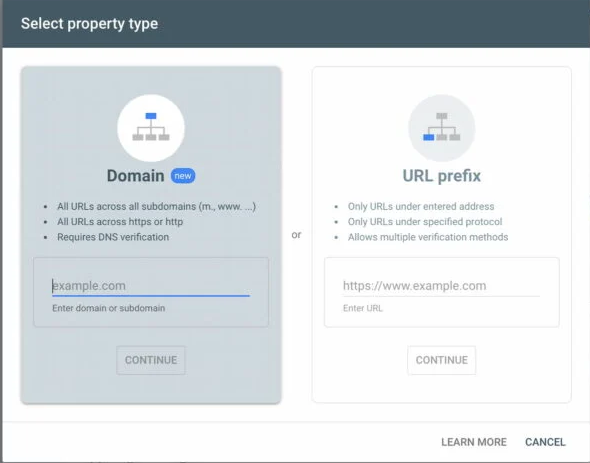
Once logged in, you will be prompted to add a property. A property represents your website. Enter your website’s URL in the provided field and click “Continue”.
Step 3: Verify Ownership
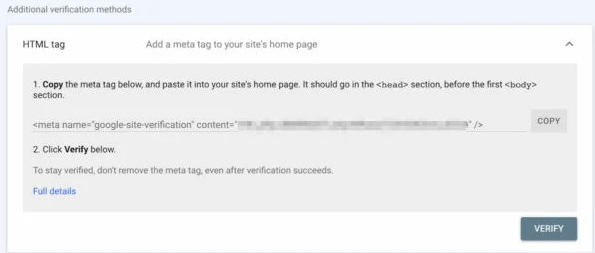
To assure that you are the rightful owner of the website, you need to verify it. Google Search provides various authentication methods. The recommend method is to upload an HTML file to your website. Here’s how:
- Download the HTML validation file provided by Google.
- Upload this file to the root directory of your website using an FTP client or file manager in your hosting control panel.
- Click “Verify” in Google Search Console.
Alternatively, you can choose a different verification method, such as adding a meta tag to your site’s HTML or verifying via Google Analytics.
Step 4: Explore the Google Search Console Dashboard
Congratulate! You’ve successfully added your site to GSC. You’ll now be directed to the dashboard, where you can access a wealth of information regarding your website.
Step 5: Submit a Sitemap
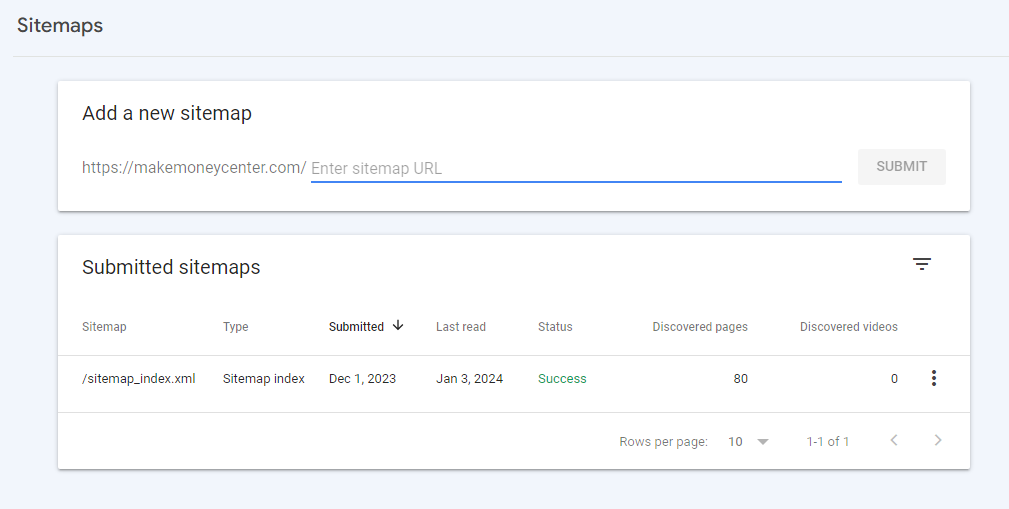
A sitemap helps Google understand the structure of your site and index it more effectively. If you have not already created a sitemap, you can use various online tools to generate one. Once you have your sitemap.xml file, submitting it to Google Search Console:
- In the left-hand menu, click on “Sitemaps.”
- Enter the path to your sitemap and click “Submit.”
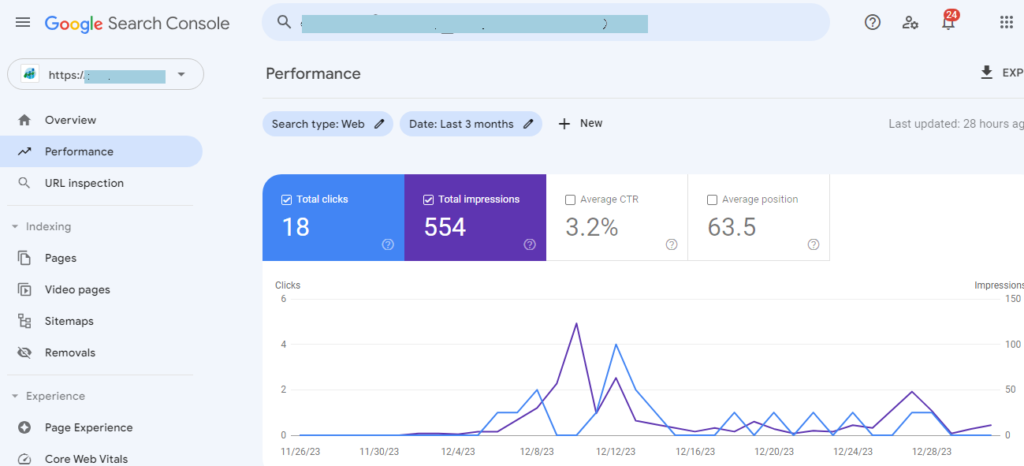
Step 6: Monitor Performance and Fix Issues
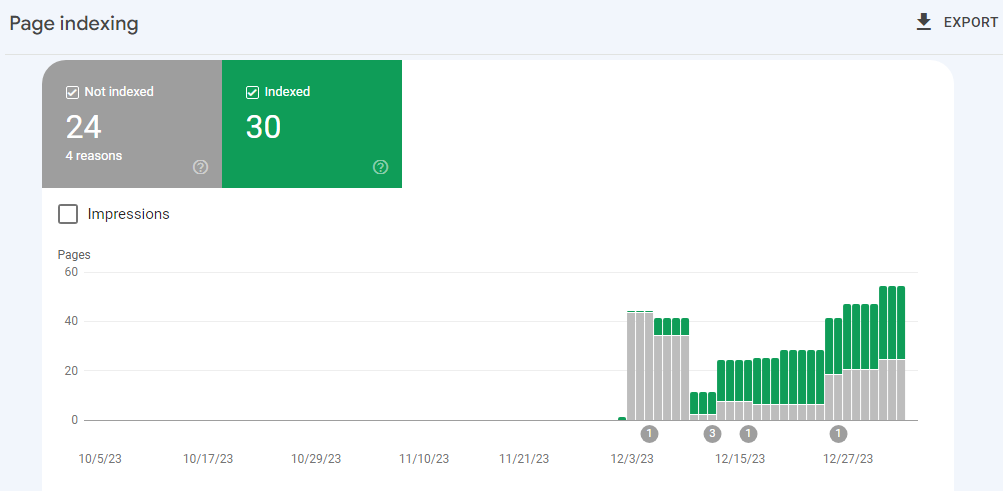
Explore the various sections of Google Search Console to monitor your site’s performance. Pay attention to:
Performance: Analyze your site’s clicks, impressions, and average position in search results.
- Coverage: Check for indexing issues, errors, and excluded pages.
- Enhances: Identify opportunities to improve mobile usability, speed, and other enhancements.
Step 7: Set Up Email Notifications
Remain informed about critical issues by setting up email notifications. In the “Settings” menu, click on “Preferences” and configure your favorite notification settings.
Step 8: Utilize Additional Features
Google Search Console provides various features beyond the basics. Explore:
- URL Inspection: Enter a specific URL to check its indexing status and troubleshoot issues.
- Mobile Usability: Ensure your site is mobile-friendly.
- Security Issues: Check for any security concerns affecting your site.
Conclusion
By adding your site to Google Search Console and routinely monitoring its performance, you empower yourself to optimize for search engines effectively. This tool is your ally in increasing your site’s visibility and addressing any potential issues promptly. Stay engaged, explore the features, and watch your website prosper in the digital landscape. Happy optimizing!
CRAFTING AN SEO-FRIENDLY DOMAIN: A STEP-BY-STEP GUIDE FOR YOUR BLOG MAKE $599.
Top 15 Best Keyword Research Websites for Your Blog Success — Make Money Center
From the insightful commentary to the captivating writing, every word of this post is top-notch. Kudos to the author for producing such fantastic content.